Everything you wanted to know about Long Exposure filters
My long exposure images would not be possible without the use of neutral density (ND) filters. They allow me to smooth the sky and smooth water all in-camera, among other things, by increasing my exposure time. Most commonly I use 16 stops of ND filters, which in the middle of a normal bright day will give me exposure times in-between 5-7 minutes. This time is a function of other camera settings obviously, and for me those are ISO 100 and f/7.1 (or thereabout).
My friend Joel Tjintjelaar (one of the long exposure masters) wrote: “Everything you wanted to know about Long Exposure filters, Fine-art architectural photography and the preferred choice of ND filters for international award-winning photographers such as Mabry Campbell, myself and Julia Anna Gospodarou who interviewed VP of marketing from Formatt Hitech Ltd Rod Clark in this great video interview.”
For full disclosure of course, I am a sponsored photographer of Formatt-Hitech. I use their filters not because they are a sponsor, but because their filters are ridiculously neutral with hardly any color cast. Color cast can be a major problem when using ND filters which you will also learn in the video below. I specifically use Formatt-Hitech ProStop IRND 100mm square filters. I no longer use filters by B+W filters or Lee. Formatt-Hitech is far superior in my opinion. Bottom line, I use equipment that helps me make the highest quality fine art images I can.
Video with Rod Clark of Formatt-Hitech:
Long Exposure Image:
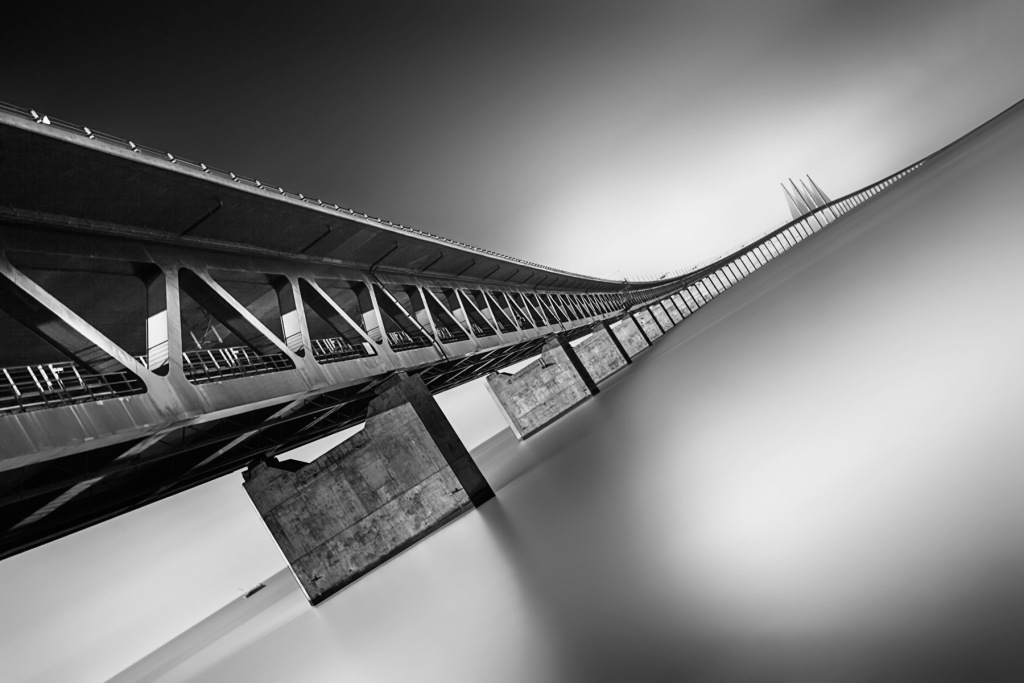
In my image below the exposure time was 6.5 minutes using 16 stops of ND filters, f/7.1, ISO 100. The silky smooth water and sky were not created in Photoshop with a fancy trick! Those elements were created in-camera during the original exposure. It’s my opinion to get as much “right’ in-camera as you can.

Iron Connection – Mabry Campbell
I hope you found this helpful! Long exposure photography has a steep learning curve, and it brings out ALL the flaws in our equipment, so as usual please email me (mabrycampbell@gmail.com) or post your questions in Comments and I’ll be happy to answer any questions you may have.
Thank you!
Mabry
Mabry Campbell Photography: Website ⎟ Facebook ⎟ Google+ ⎟ LinkedIn ⎟ Flickr


Pingback: Everything you wanted to know about Long Exposure filters | putri aka puma's Blog
Reblogged this on rebloggobbler.
LikeLiked by 1 person
I’ve only tried this once and I realized I don’t have a dark enough filter. It’s on my list. Thanks for the video!
LikeLiked by 1 person
wow
LikeLiked by 1 person
thanks for posting this…I just saw your Teal Water before this post and commented, not knowing about this post…I have far too much to learn about my camera and taking photos, before I could start asking intelligent questions!!! This statement is profound…very true… “It’s my opinion to get as much “right’ in-camera as you can”. When I began taking photos there was so much about the camera I didn’t know and it was confusing to me, so I decided to concentrate on composition, lighting, subject, enjoying what I was doing and work with the auto settings…I figured eventually I would want to learn the camera and how it operates once I had more confidence in taking photos…I have to admit the workings of my camera intimidate me! but I know to improve I have to learn how to operate it properly…which I will do, eventually!
LikeLiked by 1 person
Don’t be intimidated :)). The best thing to do (most say) is what you’re doing…composition!! Images start to get “prettier” when you learn control over f-stop and shutter speed. Try shooting in aperture-priority (AV) mode to have control of the aperture. Set ISO to auto. Shutter speed will automatically be in auto in AV mode. See what you can do in that mode. Try shooting “wide open”, at the lowest f-stop like 2.8 or 4 or whatever your lens allows. You’re images will change tremendously.
LikeLike
lol…for such a small thing my camera is intimidating! 🙂 I have a Nikon D3000,( second hand, but like new) with a new AF-S Nikkor 55-200mm 1:4-5.6G lens on it right now. So…I’ve copied/pasted/printed the above suggestion and will give it a try…doesn’t sound overly complicated. I think part of my problem is not knowing where to begin and over complicating as a result…I didn’t get a manual with the camera and while I’ve research online and purchased a book it isn’t working for me…I learn by doing. I will let you know how I make out…thank you again for your understanding and help, it is much appreciated!!!
LikeLike
The top dial is where you set it to Aperture Priority…I shoot Canon, but I believe the letter you’re looking for is “A”. That’s the mode. Then on the back of the camera spin the dial and the aperture will change and all the other settings will be in Auto. Get the aperture to as low a number as possible. That will give you the blur effect…bokeh. Let me know how it goes. :))
LikeLike
Yes, A it is…got it all set, was not difficult to do, the lowest the aperture goes on my camera is 4…didn’t know what that dial was for…now I do! When you explain it, it sounds so simple, but then you know what you are talking about and don’t explain with too much technical information, or more than I require. This is awesome, I’m excited to see what I can do…thank you!!! I’ll let you know how I make out! :))
LikeLike