Long Exposure Tutorial: Eliminating Light Leaks
Long Exposure Tutorial: Eliminating Light Leaks Shooting long exposure photographs (which to me is any exposure from 30 seconds to 12 minutes or longer) using neutral density filters brings out all the imperfections and flaws in your gear and can create problems that frustrate many photographers. One of those problems is light leaks, and its a big one. So what is a light leak? During a long exposure the shutter is open for an extended period of time. This time allows very small amounts of light to enter your camera and be recorded on your sensor. Many times a light leak will ruin your image. Light still enters my camera, and probably yours, on a fast shutter speed of let’s say 1/500 sec, but that shot time doesn’t allow the minor amount of light to be recorded on the sensor. But when you start shooting long exposures, light leaks will likely appear. So this tutorial will show you how I eliminate light leaks on long exposures with items you probably already posses and will help you make clean long exposures in-camera.
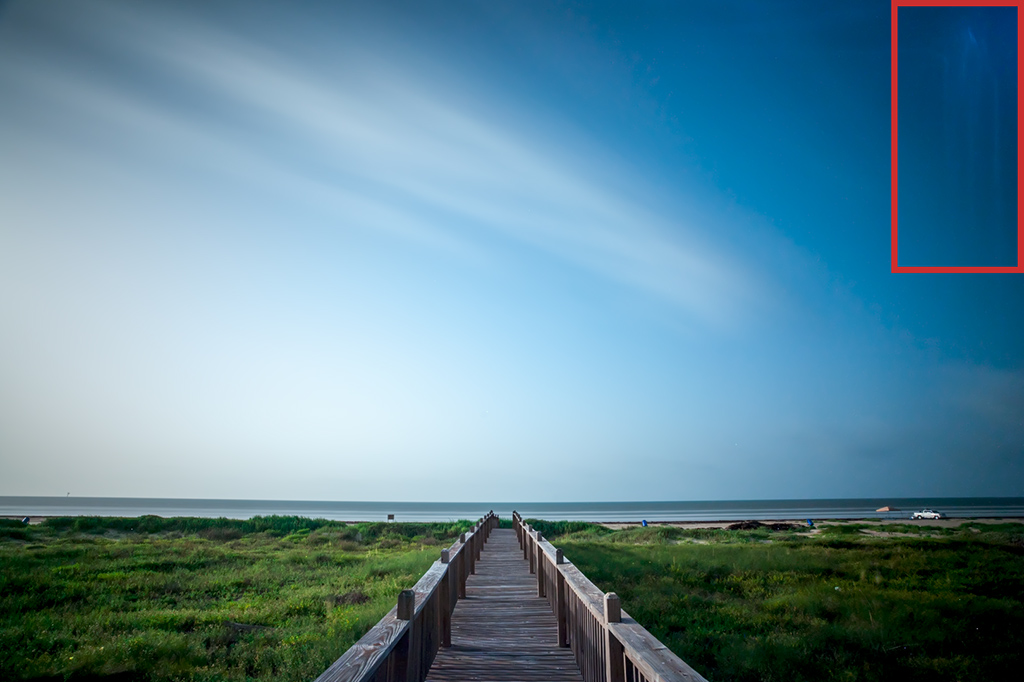
(Image 1) Light leak example
As you can see in Image 1, this is a simple 5 minute long exposure of a wooden walking path heading out over the dunes to the ocean. It looked like a good exposure on my camera’s LCD, but the light leak in the upper right hand corner was clearly visible on my main display. This is not a terrible light leak, but since it’s there I would be forced to spend lot of time cloning it out instead of using that time to make my image. In high resolution it is much larger and pronounced. Overall, it is unacceptable to me.
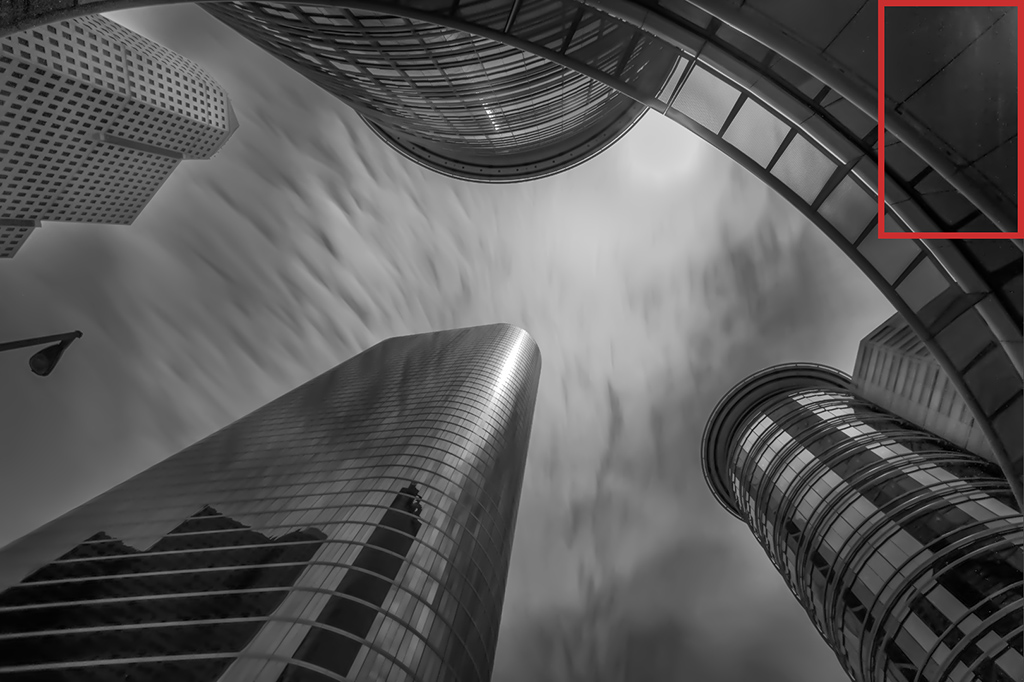
(Image 2) Light leak example
Here on Image 2 I had another light leak. My intention was to have the identified area inside of a square crop, but when I saw the leak things changed. When converted to a simple black and white, the light leaks appears slightly different, but still just as annoying and a time-waster. Just because Image 1 and Image 2 light leaks are on the same place on the image, they can be anywhere. My thoughts on these is that the light was entering the camera from the same place, so the damage to the image is similar.
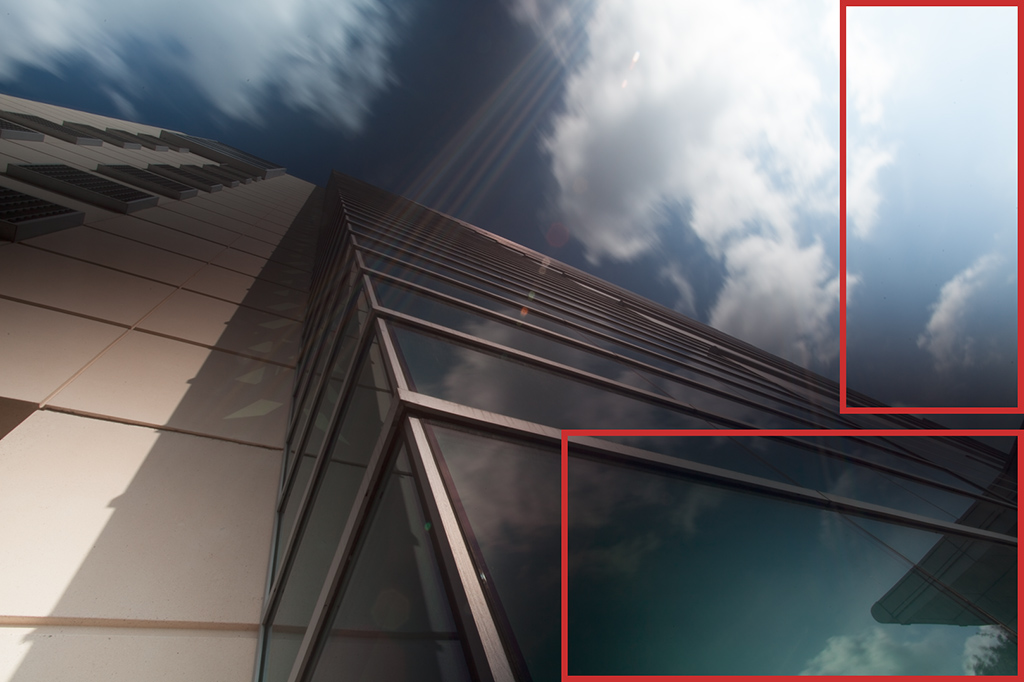
(Image 3) Light leak example
Image 3 is a total disaster, making the image basically unusable. And the leaks in this example look different — there resemble a glow of light instead of paint running down a wall. Again, light leaks present themselves in many looks and forms. Interestingly, this is only a thirty second exposure! So that relatively short long exposure time can totally be destroyed by light leaks. Now lets’s stop these in-camera and spend our time making an image instead of correcting screw-ups. And remember that long exposures will bring out all the flaws in our gear because they push the limits of our equipment, so this is expected. So here are the things that I do and use to eliminate all light leaks, and I use them all simpultanueously. The result is that I have completely eliminated light leaks on my straight-out-of-camera images…no matter what the environment I am in. Items you will need: (1) gaffer’s tape (other thick tape will work, like duck tape, but gaffer’s tape will not leave residue on your camera, (2) a lens bag (every lens comes with a lens bag and you may have a drawer of them doing nothing), (3) scissors, and (4) a dark and light-blocking hat (a tightly knitted ski hat will work or a solid baseball hat, a mesh hat will not work). Basically any hat that stops light from passing through it. Thats all! Tip 1: Shoot from shade, when possible. Obviously more light will enter various areas of your camera when direct sunlight is pounding down upon it. Obvious, yes, but a simple step. Many times this is not possible and you will have to have your camera in direct sunlight. Tip 2: I don’t don’t want a to be carrying around a huge roll of gaffer’s tape. So what I do in roll long strips of gaffer’s tape on parts of my tripod. This keeps things light, and keeps the tape right where I need it. Image 4 and Image 5 show how I carry my gaffer’s tape.

(Image 4) Gaffer’s tape on tripod
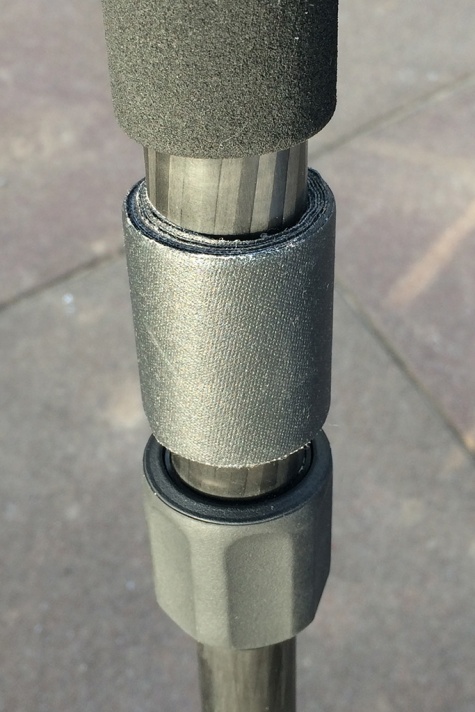
(Image 5) Gaffer’s tape on tripod leg
So this manner of having plenty of gaffer’s tape handy works great for me. It is a great space/weight saver for a critical item needed to stop light leaks. Gaffer’s tape can also be reused since it does’t leave a residue and remains sticky for several uses. Tip 3: Cover the viewfinder of camera with a piece of gaffer’s tape. Some camera models, like the Nikon D800, have a built in curtain for the viewfinder. This is nice but light still can find a way through the seams. So be 100% sure, and use the gaffer’s tape.
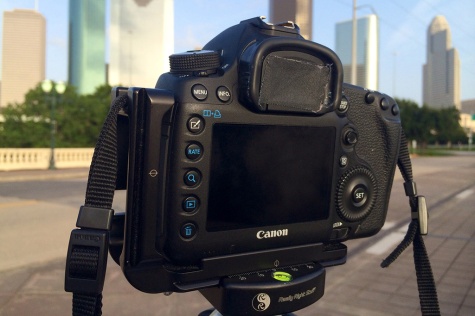
(Image 6) Gaffer’s tape over viewfinder overview
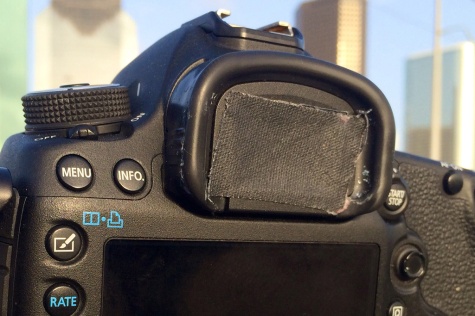
(Image 7) Gaffer’s tape over viewfinder close up
Image 6 and Image 7 display how I cover my viewfinder with gaffer’s tape. This is not a beauty contest, this is meant to stop light from ruining exposures. So don’t worry about how things look, Just make sure the tape covers the entire viewfinder and is pressed down on the edges. Tip 4: Use your factory-supplied lens case, or something similar, to black out the lens. Why is this necessary? Well lenses can let in light as well — through the zoom, AF/MF switch, the lens casing, etc, and that light will hit the sensor. Some lenses, like tilt-shifts, have no gaskets or weatherproofing. These lenses leak like like crazy! They are phenomenal lenses but as I keep repeating here, long exposure brings out any weakness. I shoot Canon, and their lens bags have a vinyl base and thick fabric side walls. This is perfect. Vinyl will stop light and the thick fabric on the rest of the bag will as well. They are small and light and so fit easily into your camera bag.
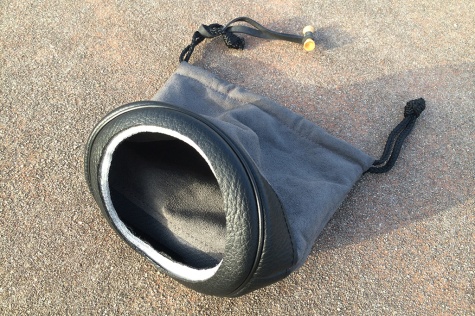
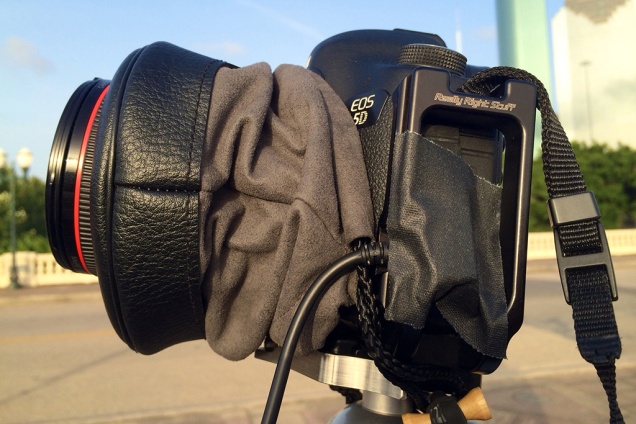
(Image 8) Canon lens bag
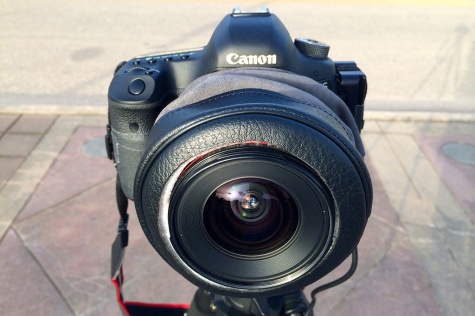
(Image 9) Canon Lens bag on lens
In Image 8 you can see that I used scissors the cut a circular opening in my Canon lens bag. I cut the hole just large enough to fit around the front of the lens. You can see this lens bag in place in Image 9. Not too loose and not too tight. Take your time when cutting the hole because you want it tight enough to block light, but not so tight that you cannot get it on the lens. Make sure that the lens bag pushes as firmly as possible against the front of the camera body. You can even use more gaffer’s tape here. So now the entire lens is covered. A point of note…if you are using a tilt shift lens and/or manual focus, it is best to get these settings the way you want them before placing the lens bag over the lens. Tip 5: Put gaffer’s tape over the component ports on the side of the camera. These ports are a significant source of light leaks. Obviously before you tape this area, make sure all your components are plugged in. In my case I am always using a shutter timer, so I plug that in first, get the cord in a suitable position, and then tape up the entire area.
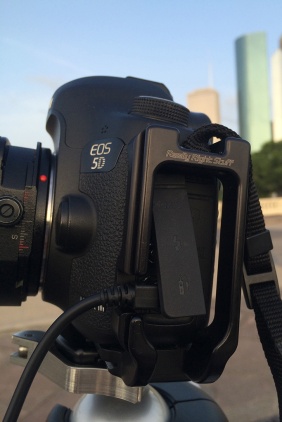
(Image 10) Untaped component ports
(Image 11) Taped component ports
Image 10 shows my timer cable connected to the side of the camera body and the exposed components ports. The simple solution to stopping light from entering the camera from the component ports is shown in Image 11. There the ports have been covered by another piece of gaffer’s tape, or multiple pieces, whatever it takes. Now this area of the camera that is susceptible to light leaks is sealed off and blacked out. Tip 6: Apply gaffer’s tape around your neutral density filters. This serves a few proposes. First, it ensures that the light I want entering the lens is evenly attenuated across the filters. These are Formatt-Hitech filters (a 6 stop stacked on a 10stop), and even though they have built-in gaskets between them, light will find a way to sneak in. So in this setup I want an even 16 stops of neutral density for all light entering the lens. I don’t want some light to be stopped down 16x and some light to be stopped down 10x, due to light penetrating between the filters. Second, the tape stops all direct light from bypassing the filters altogether. When this happens, some parts of the exposure will be blown out (a form of light leak) and some will be correct. Obviously, this mixture would be a unsatisfactory result. I want all light entering the lens to be stopped down 16x.
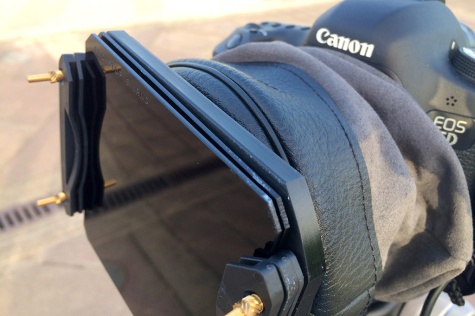
(Image 12) No tape around Formatt-Hitech Filters
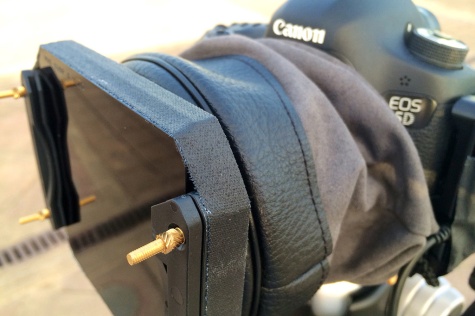
(Image 13) Tape around Formatt-Hitech Filters
Image 12 shows the Formatt-Hitech filters (ProStop IRND 100mm) properly inserted into the filter holder and attached to the lens. It is easy to see the gaps which could let in light. Image 13 shows the same filters but with a thin strip of gaffer’s tape placed completely around then and the filter holder. In both of these images you can see that since the lens bag is longer than the lens, it crumbles up on itself and actually pushes against the back of the filter holder as well as the camera body. This is great because it helps eliminate any gaps where light could penetrate. Tip 7: Hang a dark cap over the body of the camera. It may look funny but again this is not a beauty contest. The hat shades the entire camera body of course. Light could enter the camera body via the control buttons, a small crack, the battery cover, the card slot cover, and on and on. The hat eliminates all of these possibilities.
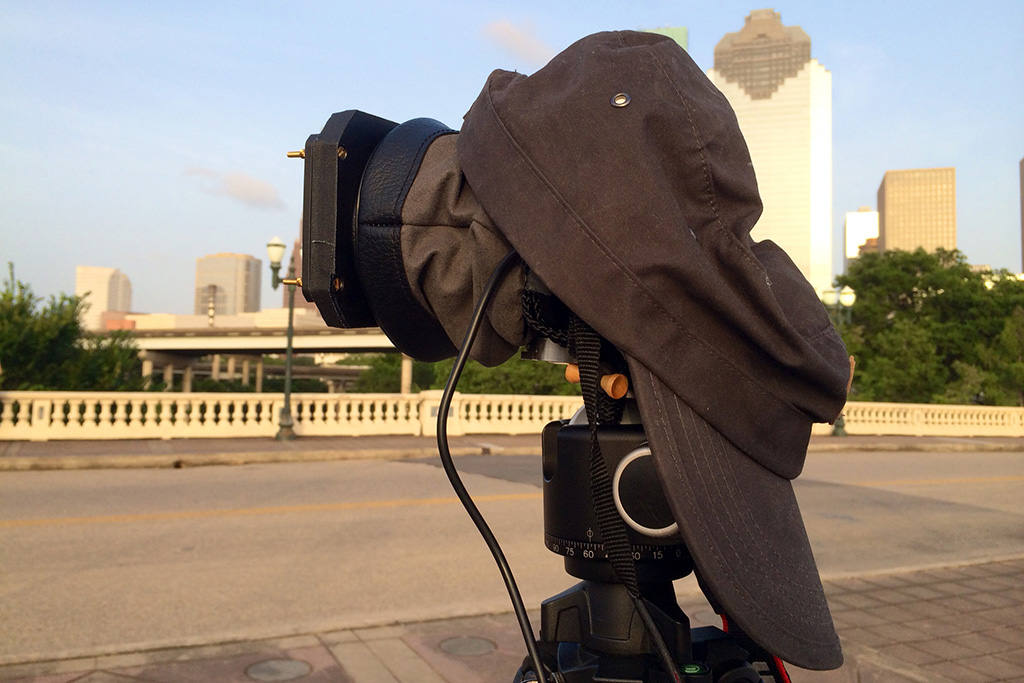
(Image 14) Hat on back of Canon 5D MK III
In Image 14 we can see my hat keeping light from reaching any part of the back of my camera. The hat also helps keep the camera cool in hot climates. Often in hot climates a long exposure can result in an extremely noisy image. So use a hat. And it does’t need to be a baseball styled hat like the one shown. I have often used tightly knitted ski caps, skull caps, fleece hats, and even a coat. The point being, shade the back of the camera by any means available. That’s it! Remember to take your time when protecting your gear from light leaks. Check around for gaps and inspect everything. These are long exposures and the last thing you want to happen is to wait 11 minutes for the exposure to complete and then realize it’s been ruined by light leaks. These tips should completely eliminate any light leaks on your sensor during a long exposure, and enhance your enjoyment of long exposure photography. And when in doubt, use more tape. Please email me at mabrycampbell@gmail.com with any additional questions on long exposure photography that you might have. Thanks! -Mabry Some of my gear you’ve seen in these photos: Canon EOS 5D Mark III Canon TS-E 24mm f/3.5 L Induro CT 214 tripod Really Right Stuff BH-55 ballhead Formatt-Hitech IRND Neutral Density Filters (100mm squares) — http://formatt-hitech.com. They are fantastic filters and the only ones I use. Mabry Campbell Photography: Website ⎟ Facebook ⎟ Google+ ⎟ LinkedIn ⎟ Flickr http://www.mabrycampbell.com


Wow! Fantastic ideas, tutorial, and images to go along with it! Thanks for all if the info Mabe! BTW, I think your camera looks pretty cute all dressed up! :))
LikeLiked by 1 person
I just started using the hitech 16 stop firecrest square filter in a Lee holder. I noticed an arch formation on the top and bottom of the photos I took. I had everything covered except where the Lee filter holder holds the Firecrest. This article really helped me. When I looked closely at the square filter in the holder I could see a tiny gap where light could get in. Despite putting the foam on the hitech filter light was still getting in. I am going to get some gaffers tape and solve this problem thanks to this article. I have tremendous admiration for your work. Very inspirational.
By the way. I use a towel and throw it over the camera to block out light completely. People look at me like I’m strange but it covers everything nicely except where the holder meets the filter. I took this photo the first day I bought the 16 stop firecrest: https://flic.kr/p/sdRy4v
LikeLiked by 1 person
Hi
I am using a Hitech 16 stop ND filter to take long exposures. I notice that there is a arched or curved artifact of some kind on my photos. It would seem to be a light leak…..however..then i special care to cover the entire view finder. Still….the “light leak” persists. I’m using a 100mm square filter with Lucroit 100 system.
LikeLike
I’ve been thinking about the problem of long-exposure light-leaks with my tilt-shift lenses for a while. That lens-bag idea is genius!
LikeLike
Glad you like it. Works so great!
LikeLike
Hello, Great article on light leaks . I’ve just purchased two Nikon tilt shifts for my landscapes and was stopped dead in my tracks with light leaks.
LikeLiked by 1 person
Great. And tilt-shifts are 100% the worst when it comes to like leaks on long exposures. Let me know how it goes! – Mabry
LikeLike
Im so glad to hear that!
LikeLike
I use a black bag, the sort you get with retail collections, 12 x 12 inch is a good size, this fits around the camera and the lens mount, I secure it with a couple of bungee cords. Have not used the lens bag, don’t find I have light leaks with my lenses, so far. Hats may not work in windy/wet conditions.
LikeLike