Making of “KPN Tower ~ Working Dynamics” – A Road To Fine Art
Making of “KPN Tower ~ Working Dynamics” – A Road To Fine Art
…complete with a stunning video of my post-processing by Nicholas Rizzo of Rizzo Media Factory . (Video at the end of this tutorial)

KPN Tower ~ Working Dynamics I – Mabry Campbell
Final Image
The making of this image, KPN Tower ~ Working Dynamics I, was a huge process and it began in Rotterdam, The Netherlands. Rotterdam is perhaps the most exciting city I have ever visited to view and photograph architecture. Everything there is amazing. Upon arrival I was immediately shown around the city by my good friend Armand Dijcks. Armand is a local and knows his city very well. I’d like to give him credit for showing me this view, and according to him it has never been shot before. I doubt I would have found this view without Armand’s help. Additionally, the style of black and white post-processing that I used on this image is based on a technique developed by Joel Tjintjelaar. This tutorial is meant to show you the post-processing workflow that this image went through, with maximum visual explanation.
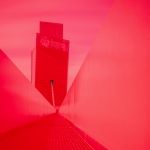
What you’re in this image is a narrow and elevated pedestrian walkway near the nhow Rotterdam hotel, with KPN Telecom Tower as the subject, framed by the walls of the walkway. There is no compositing in this image of any kind. KPN Telecom tower is a fascinating building and was designed by renowned architect Renzo Piano. Although the building face is leaning forward, like an slightly open oven door, the white support column is purely cosmetic. It provides no real support to the structure.
Black and white images reach their maximum potential when the color image is as accurate as possible (proper exposure, white balance, noise reduction, color separation, etc.), so let’s begin there.

Here is my straight-out-of-camera image — my post-processing starting point.
My first real task was eliminating the massive amount of paper in the windows. They are distracting and unneeded with where I wanted to take the image. So I spent a few hours cloning out every piece of paper on the facade at 500% zoom.


In the above close-ups you can really see what I’m taking about. The paper in the windows is a mess, but there was nothing I could do about it at the time of the original exposure. I had to get it cleaned up in post-processing. And the time spent doing this was well worth it. With that done, my next steps were to clean up the sides of the walkway (they were very dirty), color correction across the image in Lightroom 5 and in NIK Color Efex Pro 4, and noise reduction in NIK DFine.

This is the finished color image, which was the base image for all of my black and white conversions. In preparing the color image, I never added contrast, clarity, sharpening, or anything else like that. Those refinements to the image are all done in the black and white post-processing, and applied extremely locally, not globally. You can see this in the image above. It is still flat, as a RAW file is, but that’s okay. All I want at this point is a clean image with correct colors.
Hard Selections. My next step was to make numerous hard selections across the entire image. I make hard selections with the Pen Tool and Polygonal Lasso Tool at 500% zoom in Photoshop 6. These take time and I am very precise in this process. If your selections are not perfect then the final image will show them. Take your time and get the correct the first time. Since these take time, it is extremely important to save these selection as well as the main image file. Hard selections are saved as Alpha Channels in Photoshop 6 and I use them to create presence, contract, and alter the light so that the image can be created to fit my vision. Quick tip: When making hard selections NEVER draw the same line twice. They will never match up. Instead, I use Inverse on selections and then take away what is selected to make a new selection. So use simple geometry to your benefit. I also load selections (one, some, or all) and then “remove from selection” in the Selections menu to speed up the process and ensure that no line, or lines, are drawn twice.


These hard selections are shown in Quick Mask Mode so that they are more visible to you (the marching ants won’t show them in this tutorial). You can see that I covered the entire image in great detail. Every hard selection represents an area of the image that I worked on…again, altering the presence, contrast, depth, and light. This amount of control over an image in post-processing cannot be achieved through a basic black and white conversion, or even through using control points in NIK Silver Efex Pro 2.
Luminosity Selections. After the hard selection, I made luminosity selections. Luminosity selections are made somewhat automatically in Photoshop 6 and are based on light values. They are fantastic selections that enable precision control over the image. The light areas of these images are area that are selected and saved. Conversely, the black areas are not selected and therefore will not be effected when an adjustment is made. These luminosity selections cover the brightest lights, to the darkest darks, to the mid-tones.


I used these luminosity selections in conjunction with the hard selections. For example, let’s say I just wanted to work on the dark tones of the KPN building…working selectively, not globally. What I would do, and did do, is load the appropriate dark luminosity selection and then intersect it with the hard selection of the building. So now any changes I make to my working layer will only effect the dark areas of the KNP building. Without the luminosity selection, I would have had to use just the hard selection, so changes would be localized to the building, but global with respect to the different luminosities of the building. So combining both selection methods gives me tremendous control over every part of the image.
Basic black and white conversions. In this style, and in this image, I use NIK Silver Efex Pro 2 to create my black and white layers. These layers are all stacked within Photoshop. I do not limit these simple conversions to a Neutral, High Key, and Low Key. Although I do use those conversions, I have recently added a series of conversions which cover every zone (Zone 0 – Zone 10). Doing this accomplishes two things: 1) I am able to control with tremendous accuracy the tonal range of the image….all zones are represented to the level that I want, and 2) I do not need to rely on Curves adjustment layers. I do use Curves, but sometimes even a small curves adjustment damages the underlaying layer. Said another way, it “jams it too hard”.


In order, here are three of my simple black and white conversions as generated with NIK Silver Efex Pro 2: Neutral (my working version), High Key, and Low Key. At this point, it’s all about using the selections (hard and luminosity), masking those selections, using the gradient tool to reveal the mask, and then repeating that over and over and over on every part of the image until it looks the way I want it to. This can take a tremendous amount of time, but the delayed gratification is well worth it. NOW FOR THE REALLY COOL PART!!!
I have to say it again “Now for the really cool part!”. My friend Nicholas Rizzo at Rizzo Media Factory has made a one-of-a-kind image progression video on the making of KPN Tower~Working Dynamics. It’s more than a simple image progression video, it’s more in line with an action movie trailer. You will love this, I assure you! Check out his video and see the working black and white version above transform into the final image. And by all means go full screen and turn up the volume! Enjoy.
I hope you enjoyed this tutorial. And as usual please keep the questions coming and I’ll do my best to answer right away. Leave a comment of send me an email at mabrycampbell@gmail.com.
– Mabry
Technical information in the photograph:
Canon EOS 5D Mark III
Canon TS-E 24mm f/3.5 L (full shift)
ISO 100, f/11, 539 second exposure time
16 stops of ProStop IRND filters by Formatt-Hitech
Auto white balance
Mabry Campbell Photography: Website ⎟ Facebook ⎟ Google+ ⎟ LinkedIn ⎟ Flickr


Hiya Mabe…This is an awesome explanation of how you get from in-camera to the final version! The image is incredible!!! I just forwarded this to a friend of mine who does long exposures. I think he’ll find it interesting. Sounds like you’re having fun with the travels!
LikeLiked by 1 person
Reblogged this on Laura Macky and commented:
When do I reblog? When something blows my mind……
LikeLiked by 1 person
Thanks Laura! Did the video blow your mind? I think it’s just awesome, and a bit intense. 🙂
LikeLike
You’re welcome! Yes…it really is incredible although hard to wrap my mind around some of it lol. Nicely done. 🙂 The image is amazing. 😀
LikeLiked by 1 person
How long did the final image actually take to do? Always interesting to see how other folks work.
LikeLiked by 1 person
This one took approximately 25 hrs, over 6 weeks.
LikeLike
wow!
LikeLiked by 1 person
Thank you.
LikeLike
It’s in the reader now!
LikeLiked by 1 person
Sweet bananas!!
LikeLike
haha 🙂
LikeLike
25 hrs… Lots of work! Thank you so much for sharing, Laura!
LikeLike
Mabe, You are doing some great work. If this were the olympics I’d give you a 10 out of a possible 10. The blog is superb. Something I would like to model my blog after. The show & tell is right to the point……thanks for sharing & stay well.
LikeLike
Great !
LikeLike
Hey Thierry! You found me here :-). Glad you liked it.
LikeLike
Hi Mabe.
That’s an extraordinarily precise and effective method of processing this image.
One other thing that strikes me is the way you have over-corrected the vertical shift with the PC lens to tie in with the angle of the concrete “railings”. Great example of abstract composition.
LikeLike